Setting up Eddy Bridge
You can setup Eddy Bridge on either (a) Raspberry Pi 4 (b) Raspberry Pi 3 or (c) Raspberry Pi Zero W. Setting up Eddy Bridge should take 10-30 minutes depending on your network speed. There are 5 basic steps to setup and link you account with Eddy Voice Remote.
Note: Eddy Bridge is headless, so you do NOT need a keyboard, mouse, or monitor. You interact with Eddy Bridge via the local website.
Step 1. Picking a Raspberry Pi
First you must pick a Raspberry Pi. I recommend you get a Raspberry Pi 3 kit.
Step 2. Download Eddy Bridge
- Download the corresponding hardware image
- Raspberry Pi 4 – (370 MB)
- Raspberry Pi 3 – (370 MB)
- Raspberry Pi Zero W – (370 MB)
- Firmware Updates can be downloaded here
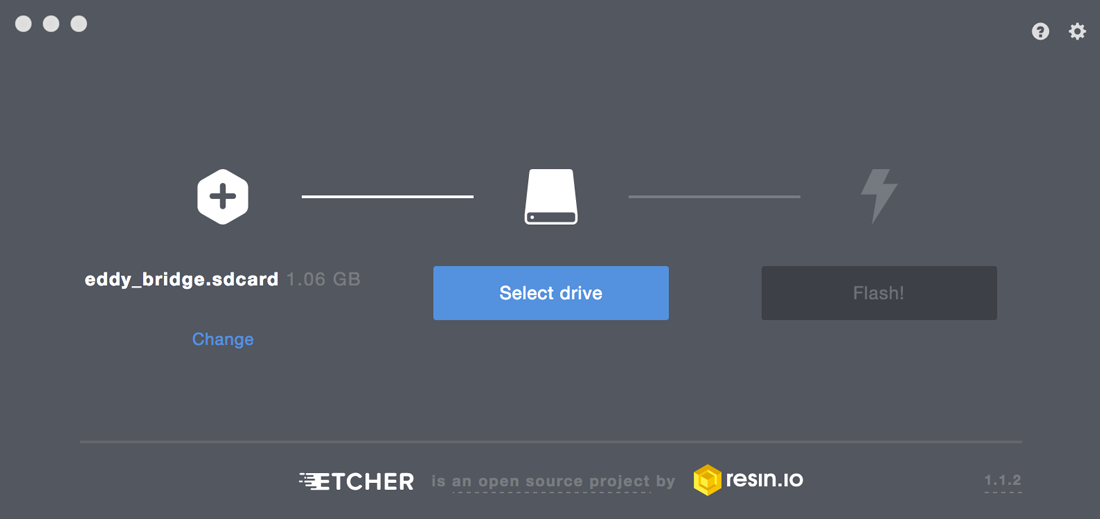
Step 3. Flashing Eddy Bridge Image
- Extract the .sdcard file using 7-zip or your favorite compression software
- Use Etcher to Flash “eddy_bridge.sdcard” on a Micro SD card.
Download Etcher
Step 4. Connecting Everything to the Raspberry Pi
- Insert the Micro SD card in your Raspberry Pi
- Insert HDMI Cable
- Insert Ethernet Cable
- Insert Power Cable and connect it to a power source
- Wait 2 minutes for the initial setup.
Step 5. Add Eddy to Homekit
- Open Homekit
- Click on the + Accessory button
- Click on “I don’t have a Code or Cannot Scan”
- Select “Eddy E145”
- Click on “Add Anyway” to the prompt that says Uncertified Accessory
- Enter the Pin: 031-45-177
- Click Continue
At this point if you have HDMI CEC enabled on your tv, you should be able to say “Siri, turn on my TV”
Optional Steps
If you need to setup wifi or link your Eddy Voice Remote account to sync devices and/or use the homekit eddy-bridge client then follow these steps.
Setup Wifi
- Connect to the newly created Wifi called “Eddy Bridge” using the password “eddyeddy“
- Using any device on the same network as your Raspberry Pi, Navigate to http://eddy.local or http://10.0.0.1

- If you want to setup wifi then click on “Wifi Setup”
- Select your Wireless Network
- Enter your password

Linking your account
- Click on the “Link Account” button and Sign in.
- Click on the “Accept” button to link your Eddy Bridge to your account
Eddy Bridge includes a 30 day trial of Eddy Voice Remote. After the 30 days you need to link your account by going to http://eddy.local or http://10.0.0.1 and clicking on Link Account. You can use the hombridge part of Eddy Bridge at no cost.
4 Replies to “Setting up Eddy Bridge”
Comments are closed.